The first quilting atom — the mighty square
The square is the basic building block of everything in quilting. Which is interesting given the fact that beds are rectangular. Still, most quilts use blocks that are square and then simply add more rows than columns to wind up with a rectangle that fits the bed. Or mostly fits the bed. Flat is also good but not always achievable.
It is said that nature builds in triangles and humankind builds in right angles, and nowhere is it more apparent than the square. Every edge the same length, every angle a 90 degree, perfection in its symmetry and beauty. For sewers (sewists for you Pink Chalk Studio fans), squares are lovely because they can be seamed first in one direction and then the other. No fancy compound or Y-seams to contend with at the meeting point of the squares.
Another interesting property of the square is that since fabric is woven at 90 degrees (with a perpendicular warp and weft), then you can keep the entire shape on the grain of the fabric. Important to those of us who would really prefer that the shapes we cut do not distort (say on the bias) when we sew them.
So I’m going to start by talking about the ways I cut squares, from scraps or fresh yardage, and then in the next few posts we’ll look at quilts made entirely of squares. And I’ll add a tutorial for a mini quilt of squares.
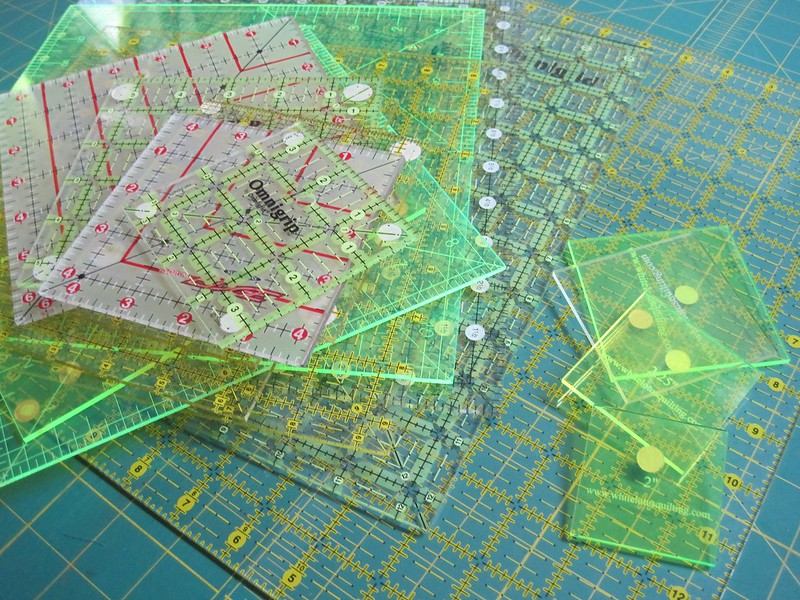
Okay, I’ll readily admit it: I love templates and cutting tools. While it’s true that you can cut just about any square size from a giant square template, I like having templates for each and every square size. It turns out that you can save a lot of cutting time by not having to register your fabric against a ruler marking, and just using the outer dimensions of the square to cut what you want.
When I can’t find the size square I want I ask my friends at Bay Creek Quilting in Coos Bay Oregon to cut special sizes for me. You can see a handful of these at the right on the picture above.
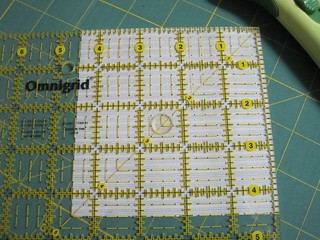
So if you have a square template larger than the square you want to cut, you can use the markings on the diagonal, and line the fabric up with the same marking on both edges, like this:
Templates like this have a diagonal line that you can use to line up the corner of the square before trimming both outer edges (already done in this picture).
The good news is that with a few larger templates you can cover all the square sizes. You don’t have to be crazy like me and procure all the square templates you can put your hands on. So if you’re a beginning quilter and don’t know where to start, be sure to get yourself a few handy-sized square templates. 4.5″, 6.5″, 9.5″, and 12.5″ are a good place to start. Sometimes they’re sold in sets and that’s a great value to begin with.
(as an aside, coming from knitting, weaving, spinning and dyeing as I have, I am used to the idea that there will be lots of tools you’ll need for what you do and they’ll be worth investing in — just think of it as investing in a tool per project, so you spread out the cost)
While we’re at it, I should mention the reason that the templates aren’t on even sizes, like 6″ etc. It’s because of the generally used and accepted seam allowance in quilting of a quarter inch. If you sew with a quarter inch seam all around a square, it adds half an inch to the cut size. So a 6.5″ square finishes out in the final quilt top at 6″. And for those among you who are math-a-phobes you can easily see that 6″ finished, an even integer, is easier to manipulate mathematically than, say, a 5.5″ inch finished block. Or a 10 5/8″ finished block. And so on. As quilters we like numbers that are easy to manipulate (unless you’ve crossed over into crazy girl piecing and quilting — you know who you are).
My preferred method for cutting squares is to use the same size template as the size square I’m trying to cut. It’s easy, fast, and more accurate than lining up the fabric to markings on the template. Miscuts can happen when you line up fabric to measurements and rarely happen when the outside of the template is the edge you’ll be cutting on.
Of course the great question then is why use templates with markings at all? For the smaller templates that I have cut for me I don’t have any markings added (save my website). But a quarter inch line all the way around might be useful.
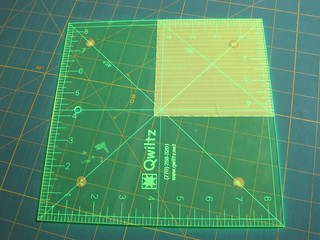
Also there are centering templates, where the markings don’t emanate from the corner but rather the center instead. If you’re trying to fussy cut a motif or center something in a square, then these can be really useful as well.
Here’s a pic of an 8.5″ centering square which also has 4.5″ square markings, very handy indeed when making up 8″ finished blocks. There are two diagonal lines running through this template that meet at the middle, and a quarter inch seam line all around the outer edge.
I should also mention that when cutting squares, unless I’m working with odd-sized scraps (or pre-cut things like charm squares — 5″ squares — or layer cakes — 10″ squares), I cut strips first, and then whack off the appropriately sized squares using a same-size template.
Here’s a picture below of a 2″ strip with a 2″ square template overlaid on it; this is how I cut 2″ squares if I have yardage available to me.
So you can start to see that there are LOTS of ways to cut squares and perhaps obviously even more ways to sew them together.
In fact, when I’m sewing a quilt that’s ALL squares I rarely cut the squares to begin with, and instead use sewn strip sets that I then cross-cut.
Clear as mud? I’ll explain a bit more when I post the tutorial for the mini trip-around-the-world quilt. Suffice it to say that even if a quilt is made up of all squares they don’t have to be individually cut and sewn. Plenty of time-saving tips in the upcoming tutorial to help you make the most of your piecing and quilting time!


So fantastic! love all the pics and awesome suggestions!
thank you so much!