Okay, so the good news is, the standard seam allowance in quilt piecing is a 1/4″. That’s good news because it’s a number that’s easy to add and fairly easy to maneuver (much more so than the standard 5/8″ in dressmaking). Keep in mind that this is a minimal seam allowance intended to be used with higher quality cottons. It’s the smallest amount you can use and still keep the seams intact when the quilt is finished. [As an aside if you get a bee in your bonnet about quilting with things like dupioni silk and brocades and other fun shiny but not necessarily stable fabric, you might need to increase the seam allowance].
But if you read many quiltmaking patterns carefully they say this cryptic magical thing about seam allowance — a ‘scant’ quarter-inch. Well what the heck does that mean? And how can you measure that on your machine? Well it turns out to be both harder and easier than you might imagine.
The first difficulty is that a quarter-inch seam allowance isn’t very big and quite often sits under a modern presser foot (some of the vintage machines had smaller feet) and maybe even directly on the line of the feed dogs (those little teethy looking things underneath the presser foot that advance the fabric). So you can’t always put a magnetic or screwed-in seam guide to help you guide the fabric under the foot at the right width.
So what to do? First, use something like an index card that has quarter-inch lines built in. You can set your foot, and needle, directly on an index card line and then see where the next card line falls underneath the sewing machine foot. Here’s Bonnie Hunter’s directions for that: quiltville’s quarter-inch seam. What she doesn’t directly address is how to know if the your quarter-inch is accurate (or should I say how accurate it is).
The important thing to know here is that in general, seams are pressed to the side in quilt piecing, as they are in dressmaking. According to my garment-constructing friends, the seam is best protected when it is pressed to the side. If a seam is pressed open — which some quiltmaking patterns call for to reduce the build-up of seam allowance bulk — the thread of the seam is directly exposed and faces the most wear. And while some quilts, like those that hang on a wall, never face a lot of wear, those that drape on a bed everyday and face the onslaught of pets and people, will definitely take on wear.
And here’s the really important bit: since the seams are pressed to the side, a small amount of fabric is rolled to the side over the stitching, and effectively takes up more seam allowance. You can never press a seam exactly on the thread if you’re pressing it to the side, and so you need to reduce the seam allowance by a few threads — hence the wacky ‘scant’ quarter-inch — in order for the pressed seam to finish out at a quarter inch. Also if you use tiny thin thread, this rollover amount is smaller than if you use huge hunky Coats star cotton thread (not to name names or anything).
So my suggestion is to start by understanding where a quarter-inch seam is located on your machine, put a few post-its or painter’s tape along the line, and try out a few seams, press them, and see what the resulting measurements are. Then you can adjust your stack of post-its (or moleskin if you have that around) or painter’s tape to accommodate how scant your seam needs to be in order to make your final measurements correct.
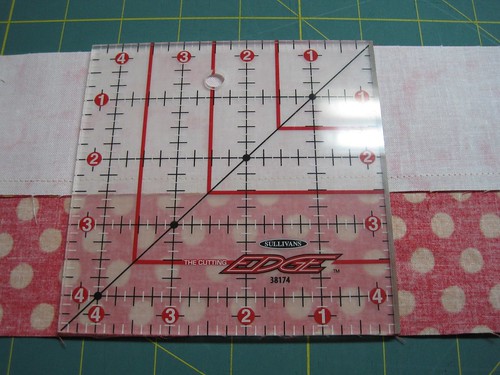
In my double four-patch baby quilt tutorial, found by clicking the link below, you start by stitching pairs of 2.5″ strips together, a light and a dark. You then open out the strip pairs and press the light under the dark. Then you can check that the sewn pair together should be 4.5″ wide. If they are less than 4.5″ together, you have too much seam allowance and need to reduce by a few threads less than a quarter-inch. If they are more than 4.5″, you have too little seam allowance and need to increase by a few threads more than a quarter-inch.

checking the accuracy of seams on a strip-pair — the height should be 4.5″ and is almost exactly on the template
If you have several sewing machines I suggest doing this on each of them, just to get a feel for where the scant quarter-inch will be on each machine. I also recommend quarter-inch sewing feet, with the caveat that the edge of the foot will probably be just a little too much seam allowance (not scant enough).
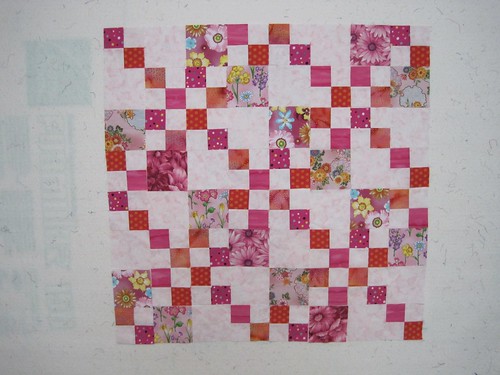
And why do quilters get their toga in a knot about how accurate the seam allowance is, anyway? Well let’s put it this way. If you had teeny weeny pieces like 1″ squares (finished) across your quilt and it’s 100″ square, you can start to see that little inaccuracies in each seam can add up REALLY quickly. A 10% error in the seams would lead to the quilt being 90 or 110 inches, depending on the direction the error is in. And remember that’s 10% of a quarter inch, so it’s really tiny on each square, but it’s replicated so many times that it makes a real difference. In dressmaking there’s only a few seams at a time and usually there’s a fair amount of leeway in each of the seam allowances, so it’s hard to imagine the scope of the seam allowance problem that quilters face.
Also if you’re only ever seaming your own quilt piecing, then as long as you’re consistent with yourself the overall accuracy doesn’t matter too much. And after all, a quilt doesn’t really need to ‘fit’ a bed so if it doesn’t come out the same size as the pattern no one is sobbing like a bride whose wedding gown doesn’t fit.
BUT — if you ever make blocks for a group project — it’s important to learn to play nice with others and try to make your blocks come out the size they were designed to be. No one is going to sweat over a sixteenth of an inch here or even an eighth of an inch (sometimes) there — but if your block is a half-inch or more short on all sides it really can’t be combined with blocks that are the correct size (because there’s no seam allowance left). If your block is a teensy bit bigger than it’s supposed to be at least it can be trimmed down a bit, even if star points get a little blunted. But if it’s too small there’s really nothing anyone can do except take it all apart and start over again with the pieces.
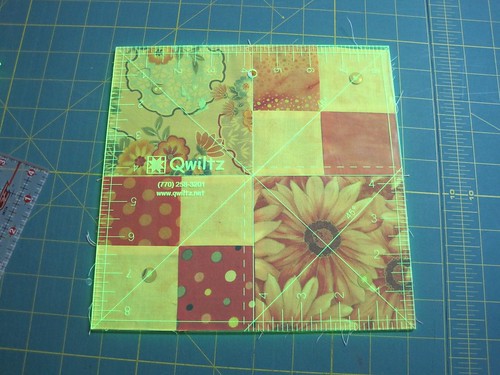
Periodically during any project I check the block size to be sure I’m on target and can live with the inaccuracies of the blocks (below you can see the upper right corner is a little small, but not beyond the seam allowance). Also I tend to make a few extra blocks and toss a few out of the mix either for size, color, etc. at the end. Those extra blocks either wind up on the back of the quilt or in another ‘frankenquilt’ [quilts made of spare parts] all together.
Think of a quarter-inch seam like a spiritual practice, something you can do over and over and over again, and perhaps never get exactly right, but continually improve. The practice, not the perfection, is what makes it worth doing.


